Connector Pin Diagram
Sensor Excitation Voltage Selection (EX+, EX-)
All meters, including models equipped with the 12-24 VDC power option, are shipped from the factory configured to provide 10 VDC excitation for the sensor. If the sensor requires 5 VDC excitation, the internal jumper J3 must be configured accordingly.
To access the voltage selection jumper:
- Remove all the wiring connectors.
- Unscrew the back cover.
- Slide out the back cover by about 1 ½ inches.
- Configure the J3 jumper, located behind the input signal connector, for the desired excitation voltage as shown.
⚠
Caution! Do not use 24V to power a strain Gage bridge. The 24 V jumper configuration should only be used for mV input applications from 4 wire sensors.
Sensor Excitation Voltage Selection
Connections
All connections are made to removable screw terminal connectors located at the rear of the meter.
⚠
Caution! Use copper wire with 60°C or 60/75°C insulation for all line voltage connections. Observe all safety regulations. Electrical wiring should be performed in accordance with all applicable national, state, and local codes to prevent damage to the meter and ensure personnel safety.
Connectors Labeling
The connectors’ label, affixed to the meter, shows the location of all connectors available with requested configuration.
⚠
Warning! Do not connect any equipment other than Interface Inc. expansion modules, cables, or meters to the RJ45 M-LINK connector. Otherwise damage will occur to the equipment and the meter.
Connector Labeling for Fully Loaded 9890
Power Connections
Power connections are made to a two-terminal connector labeled POWER on Figure 6. The meter will operate regardless of DC polarity connection. The + and – symbols are only a suggested wiring convention.
Power Connections
Signal Connections
Signal connections are made to a six-terminal connector labeled SIGNAL on Figure 6. The EX+ and EX- terminals are used to sense the sensor excitation voltage for ratiometric operation, when the sensor is powered externally (switch 1 is off).
Switch Configuration
Setup and programming is performed both through the front panel buttons and switch settings shown below. The switch configuration must correspond to the setup and programming starting on page 29 (same range, type, etc.).
Strain Gage Configuration Switch
Excitation (Switch 1)
The excitation switch designates whether the meter will use its internal power supply or an external power supply.
|
Switch 1 |
ON |
Excitation |
Internal Excitation |
When switch is turned ON, the 9890’s power supply is used. |
|
OFF |
Excitation |
External Excitation |
When switch is turned OFF, an external power supply is used. |
Range (Switch 2)
The range switch adjusts the gain of the internal circuitry. Narrower ranges require more amplification.
|
Switch 2 |
ON |
Range |
Higher Internal Gain |
Turn this switch ON for the following input ranges: 15, 30, ±15, or ±25 mV. |
|
OFF |
Range |
Lower Internal Gain |
Turn this switch OFF for the following input ranges: 150, 300, ±150, or ±250 mV. |
Polarity (Switch 3)
|
Switch 3 |
ON |
Polarity |
Range starts at zero (unipolar) |
Range starts below Turn this switch ON for the following input ranges: 15, 30, 150, or 300. |
|
OFF |
Polarity |
Range starts below zero (bipolar) |
Turn this switch OFF for the following input ranges: ±15, ±25, ±150, or ±250 mV. |
The polarity switch selects whether the range is unipolar and starts at zero (i.e. 0 to 30 mV) or bipolar and starts at a negative value, or below zero (i.e. -15 to +15 mV).
Source (Switch 4)
The source switch tells the 9890 whether the input is a strain Gage bridge (i.e. Multiple Strain Gages Connected Through Junction Box diagram below), or it is a signal from a 2 or 4 wire transducer, or mV source (i.e. mV Transducer Input Connections diagram below) .
|
Switch 4 |
ON |
Source |
Source is mV input transducer |
Turn this switch ON if the connected source is a transducer* |
|
OFF |
Source |
Source is strain gage bridge |
Turn this switch OFF if the source is a strain gage bridge |
*Ratio should be set to NO in Setup Input Menu
Shunt Resistor (Switch 5)
The 9890 provides a means of simulating strain in a strain Gage bridge circuit via a 60.4KΩ shunt resistor included in the meter. This will simulate an approximate 70% full-scale load in the case of a 350Ω strain bridge.
|
Switch 5 |
ON |
Shunt |
Shunt resistor is connected to the input bridge. |
Turn switch ON when you want to simulate a strain load |
|
OFF |
Shunt |
Shunt resistor is disconnected from the input bridge. |
Turn this switch OFF to remove the shunt resistor |
Strain Gage Connections
The following figures show examples of strain Gage connections. There is a 5-position DIP switch (CONFIG) to set up the input ranges and ratiometric operation.
NOTE: Refer to the 9890 Strain Gage, Load Cell, and mV/V Indicator Installation & User Manual Switch Configuration starting on page 12 for proper configuration switch positioning.
Strain Gage Powered by Internal Supply
Strain Gage Powered by External Supply
NOTE: Refer to Switch Configuration starting on page 12 for proper switch positioning for the following wiring configurations.
When connecting multiple strain gauges to the meter, each must be wired in parallel. This is typically done with the use of a junction box.
Multiple Strain Gages Connected Through Junction Box
mV Transducer Input Connections
Shunt Calibration
The 9890 is equipped with a means of simulating strain in a strain gauge bridge circuit, via an included shunt resistor in the meter. This technique is performed by enabling the “shunt resistor” switch (switch 5), which in turn shunts one leg of a connected strain bridge with a predetermined resistive load (60.4k). This technique can be used as a means of verifying instrumentation by simulating a physical input. With no load connected, the enabling of the shunt resistor (switch 5) will simulate approximately a 70% F.S. load in the case of a 350Ω Strain Bridge.
Shunt Resistor
Modbus RTU Serial Communications
Serial communications connection is made to an RJ45 connector labeled M-LINK on Error! Reference source not found. For interfacing to the 9890 use the 989X-232 for RS-232 or the 989X-485 for RS485. The same port is used for interfacing with all expansion modules (e.g. external relays, digital I/O).
Relay Connections
Relay connections are made to two six-terminal connectors labeled RELAY1 – RELAY4 on Figure 6. Each relay’s C terminal is common only to the normally open (NO) and normally closed (NC) contacts of the corresponding relay. The relays’ C terminals should not be confused with the COM (common) terminal of the INPUT SIGNAL connector.
Relay Connections
Switching Inductive Loads
The use of suppressors (snubbers) is strongly recommended when switching inductive loads to prevent disrupting the microprocessor’s operation. The suppressors also prolong the life of the relay contacts. Suppression can be obtained with resistor-capacitor (RC) networks assembled by the user or purchased as complete assemblies. Refer to the following circuits for RC network assembly and installation:
AC and DC Loads Protection
Choose R and C as follows:
R: 0.5 to 1 Ω for each volt across the contacts
C: 0.5 to 1 µF for each amp through closed contacts
Notes:
- Use capacitors rated for 250 VAC.
- RC networks may affect load release time of solenoid loads. Check to confirm proper operation.
- Install the RC network at the meter’s relay screw terminals. An RC network may also be installed across the load. Experiment for best results.
Low Voltage DC Loads Protection
RC Networks Available from Interface Inc.
RC networks are available from Interface Inc. and should be applied to each relay contact switching an inductive load. Part number: PDX6901.
Note: Relays are de-rated to 1/14th HP (50 watts) with an inductive load.
4-20 mA Output Connections
Connections for the 4-20 mA transmitter output are made to the connector terminals labeled MA OUT. The 4-20 mA output may be powered internally or from an external power supply.
4-20 mA Output Connection
Analog Output Power Supply
If the analog output is not using the 24 VDC supply to power the output loop, it can be used for other things. The I+ Terminal is the +24 V and the R terminal is the return.
F4 Digital Input Connections
A digital input, F4, is standard on the meter. This digital input is connected with a normally open contact across F4 and COM, or with an active low signal applied to the F4. The functionality of the F4 input is set up in the Advanced Features, User menu.
F4 Digital Input Connections
External Relays & Digital I/O Connections
The relay and the digital I/O expansion modules PDA1004 & PDA1044 are connected to the meter using a CAT5 cable provided with each module. The two RJ45 connectors on the expansion modules are identical and interchangeable; they are used to connect additional modules to the system. Note: The jumper located between the RJ45 connectors of the PDA1044 must be removed on the second digital I/O module in order for the system to recognize it as module #2.
⚠
Warning! Do not connect or disconnect the expansion modules with the power on! More detailed instructions are provided with each optional expansion module.
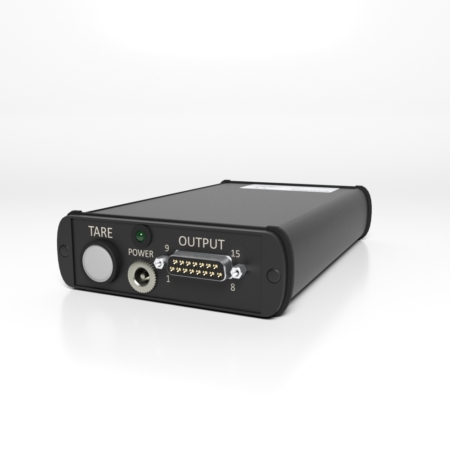
Expansion Modules & DIN Rail Mounting Kit
External Relays Module Connections
Digital I/O Module Connections
Interlock Relay Feature
As the name implies, the interlock relay feature reassigns one, or more, alarm/control relays for use as interlock relay(s). Interlock contact(s) are wired to digital input(s) and trigger the interlock relay. This feature is enabled by configuring the relay, and relative digital input(s) (Refer to the 9890 Strain Gage, Load Cell, and mV/V Indicator Installation & User Manual, Page 39.). In one example, dry interlock contacts are connected in series to one digital input which will be used to force on (energize) the assigned interlock power relay when all interlock contacts are closed (safe). The interlock relay front panel LED flashes when locked out. The interlock relay would be wired in-series with the load (N/O contact). See below.
Interlock Connections
For more information visit Electrical Wiring Diagrams


 Hydraulic Jacking System Testing
  Prosthetics Load and Fatigue Testing
  Surgical Stapler Force Verification